Frequently Asked Question
Using a CSV file, instructors and assistants with the appropriate permissions can import a large list of people into a course, which will create a new account and enroll them into the course at the same time.
Step 1: Create a CSV file
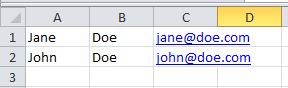
You can import a list of learners using a CSV file. Spreadsheet programs like Google Spreadsheets and Microsoft Excel make it easy to create and edit CSV files. Your CSV file should be formatted as a table and must NOT include a header, or first line, that defines the fields in your table. The file must include a first name, last name and e-mail address of each learner. The example above shows the correct format.
Once you've entered all of the names to be imported into a table, save the document and select CSV (Comma delimited) (*.csv) as the type of file you'd like to save. If prompted to verify your selection, click Yes or OK.
For still more information about CSV files, open Help in Excel.
Step 2: Click "Import Course List" from the Manage tab
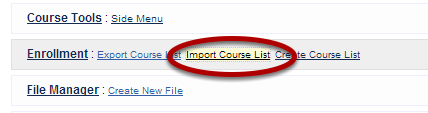
After logging in to the course as an instructor or assistant with the correct permissions, click the Manage tab, and go to the Enrollment area. Click Import Course List.
Step 3: Upload the list of students
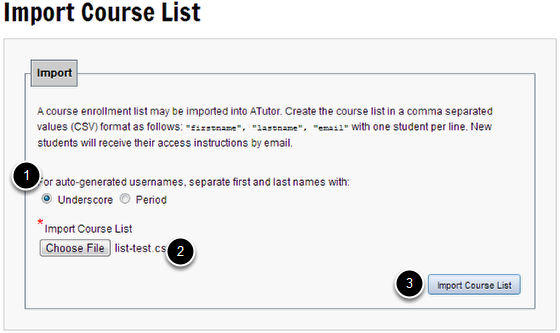
On the Import Course List page, choose how you want usernames to be created (using a dot or an underscore to separate the first name and last name) (1), and click the Choose File button (2) to locate the CSV file you created in Step 1. Click the Import Course List button (3) to load the contents of your document into the system.
Step 4: Review the import data
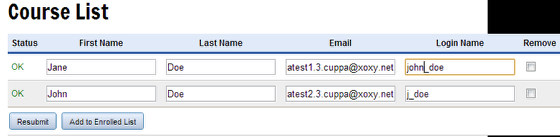
On the Course List page, review the addresses the system imported. If necessary, make any changes and click Resubmit to save the changes. Once you've approved the course list, click the Add To Enrolled List button to finish importing them.